Set Order Conditions
The Order node opens a position once your Indicator’s condition is met. This page covers how to configure the trade itself (asset, direction, order type, size, and leverage) and how to set the conditions that close it.
An Order node places a live trade the instant its upstream Indicator’s condition is met on a deployed strategy. This could mean the strategy executes orders the moment it’s deployed. Set the asset, direction, size, and leverage carefully, and backtest, before you deploy.
Open the Order node settings
Click an Order node on the canvas to open its settings panel. The panel has two sections: the order settings at the top, and the exit conditions below.
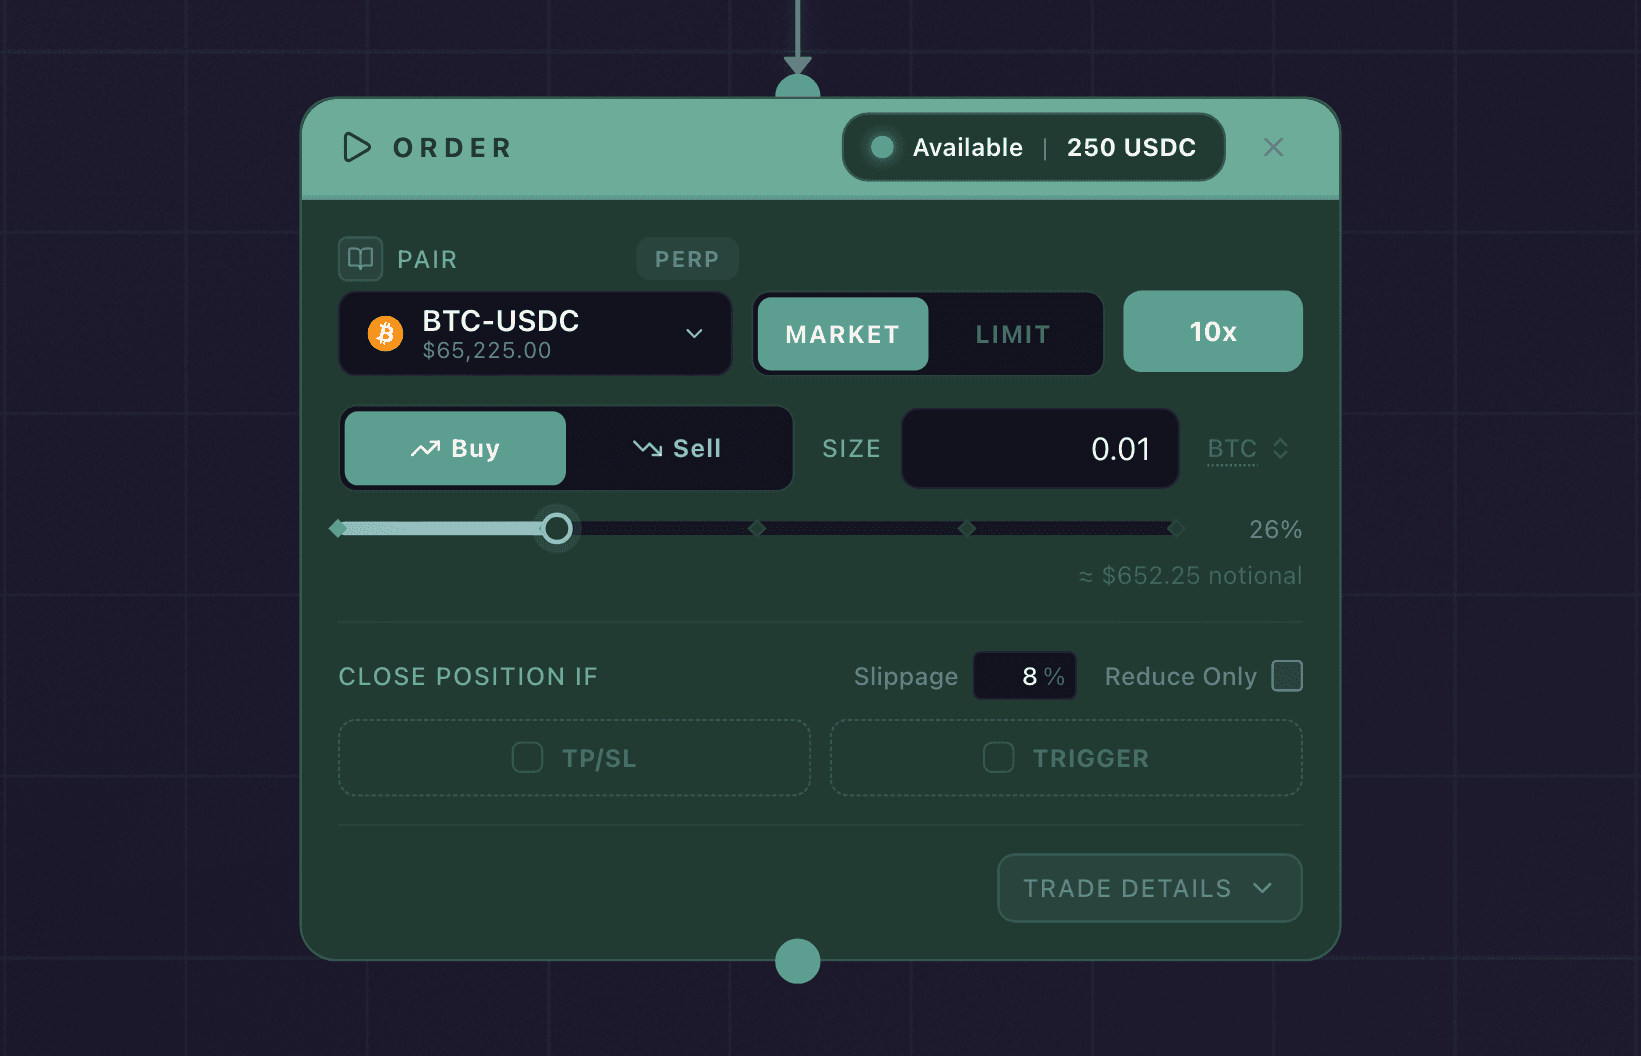
The Order node: the trade settings at the top, the exit conditions below.
Configure the order
Asset
Select the market you want to trade from the asset picker. Markets are listed by pair against the collateral token they settle in, so Hyperliquid’s main perpetuals read BTC-USDC and ETH-USDC.
The picker groups markets into tabs:
| Tab | What it holds |
|---|---|
| ALL | Every market the app can reach |
| HL MAIN | Hyperliquid’s own perpetual markets |
| TRADE XYZ | Markets from Trade XYZ, which has carried commodity, index, and single-company markets alongside crypto |
| OTHER HIP-3 | Markets from any other HIP-3 deployment |
HIP-3 is Hyperliquid’s mechanism for letting an outside builder deploy its own list of markets that still settle on Hyperliquid. Think of it as a wing added onto the exchange: separate architect, separate list of tenants, same building and same foundations. Trade XYZ is one such wing. Rows from a HIP-3 deployment carry a small badge naming it next to the pair, and the search field matches that name as well as the ticker, so typing “xyz” narrows the list to Trade XYZ.
Which markets each deployment lists is its own decision rather than Synchronicity’s, and the tabs mirror whatever is live at the moment you open the picker. A market that is not in the picker is not available to trade.
Direction
- Long: Buy to open a long position.
- Short: Sell to open a short position.
Order type
- Market: Executes immediately at the best available price. Set a slippage tolerance to limit how far the fill price can deviate from the mark price.
- Limit: Places an order at a specific price. Sits until it fills or you cancel it.
Price
For limit orders, enter the price at which you want to open the position. Not required for market orders.
Slippage tolerance
For market orders, the maximum acceptable deviation from the mark price, as a percentage. A 1% slippage tolerance means the order will not fill if the execution price is more than 1% away from the mark price.
Leverage
Set the leverage for the position. Leverage is borrowing to trade a position larger than your balance, so at 10x a $1,000 balance controls a $10,000 position, and both gains and losses are multiplied. Default is 10x. For how leverage affects margin and the risk of being liquidated (forced to close when losses eat through your margin), see Leverage, Margin, and Liquidation.
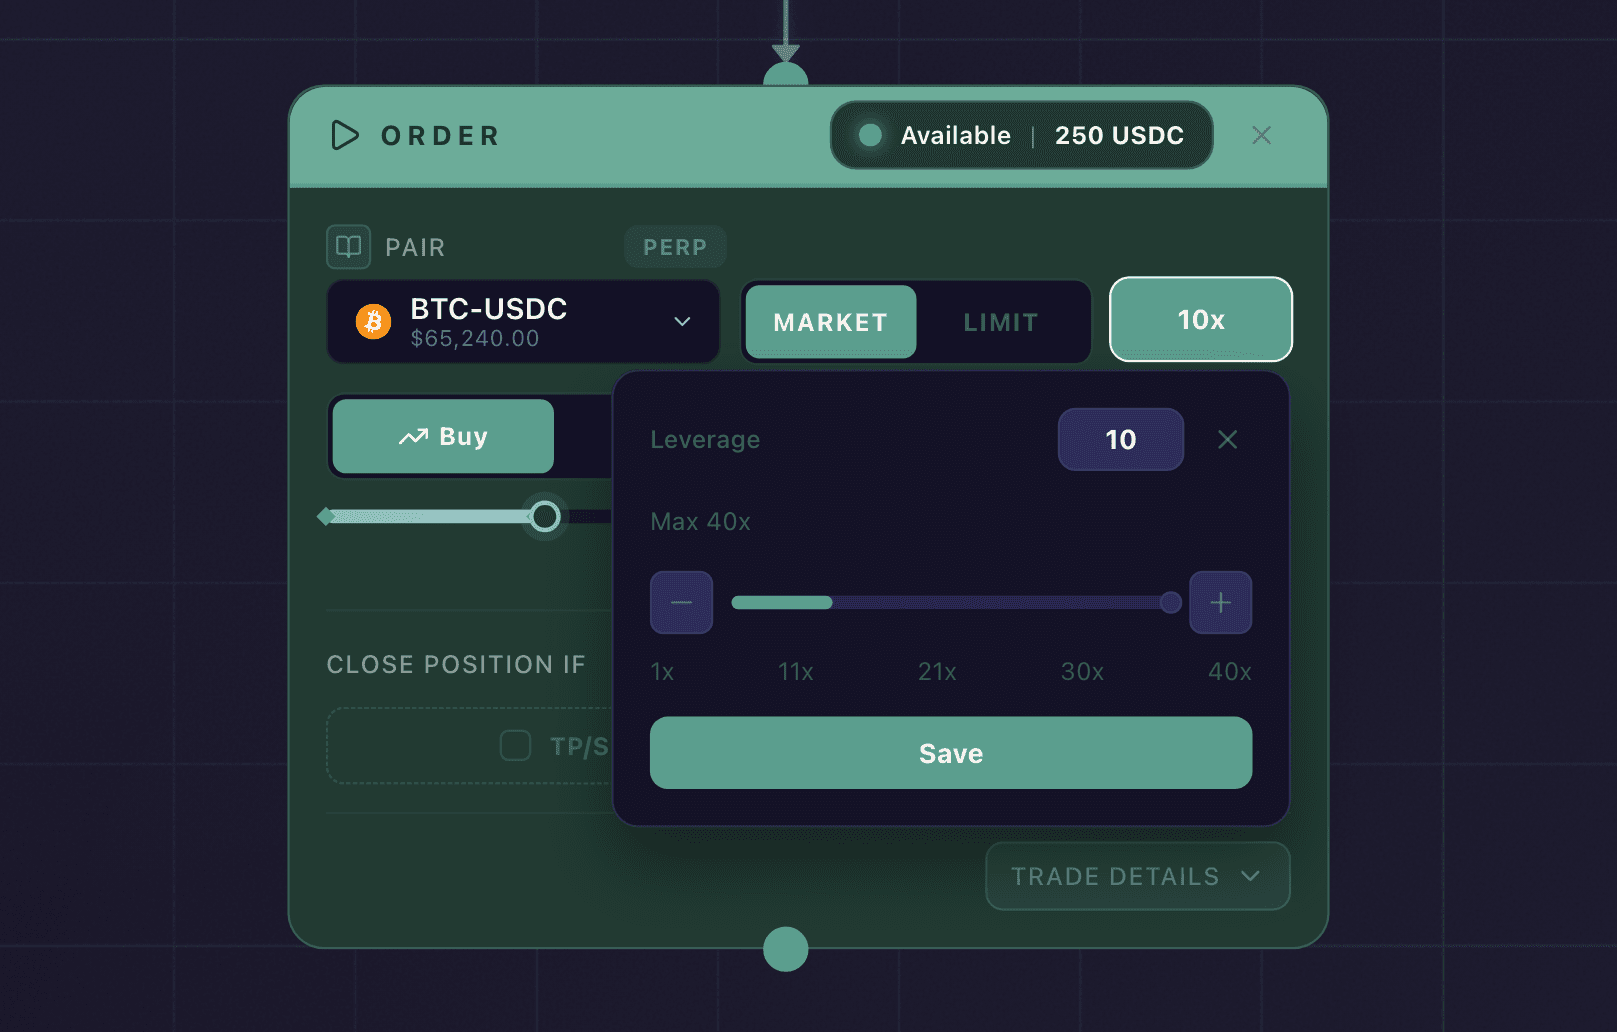
Drag the leverage slider, or type a value, then Save. The range runs from 1x up to the asset’s maximum.
Size
Enter how much to trade. You can also use the size slider to set position size as a percentage of your available balance, relative to your leverage and the current mark price.
The button on the right of the Size field names the unit the number is in, and clicking it switches between the two. On BTC-USDC it reads either BTC, meaning quantity of the base asset, or USDC, meaning notional value. 0.5 in BTC and 0.5 in USDC are two entirely different trades, separated by whatever BTC happens to cost that day, so read the button before you type. Switching converts whatever you already entered at the current reference price rather than discarding it, and the line under the slider always shows the same size in the other unit as a cross-check.
Exit conditions
After configuring the order, you set how the position closes. You can combine Take Profit / Stop Loss with a Trigger, and whichever one fires first closes the position. Reduce Only is the exception: it changes what the order itself does and cannot be combined with the others.
Take Profit / Stop Loss
Enable the TP/SL toggle to set price-based exit targets. See Configure a Take Profit and Configure a Stop Loss for detail.
Trigger (condition-based exit)
Enable the Trigger toggle to define a condition-based exit. This embeds a condition workspace inside the Order node. Use the same toolbox blocks as the Indicator node to build a formula.
When the condition is true while the position is open, a market close order is placed.
Use a Trigger when your exit depends on an indicator signal rather than a fixed price. For example, close when RSI(14) crosses above 70. Use TP/SL for plain price targets and the Trigger for everything indicator-driven.
Cancel If (limit orders only)
A limit order rests at your price until it fills. Sometimes the reason you placed it stops being true before it ever gets there. Cancel If pulls the resting order back when a condition you define becomes true, so a stale limit order does not fill into a setup that has already broken.
It appears only when the order type is Limit. Click Add Cancel If to open a condition workspace, built from the same toolbox blocks as the Indicator node, and the order is withdrawn the moment that condition reads true. Switch the order back to Market and the Cancel If setting disappears, since a market order fills at once and leaves nothing resting to cancel.
The difference between the two: the Trigger closes a position that is already open, while Cancel If withdraws an order that has not filled yet.
Reduce Only
Enable Reduce Only to make the order a partial close rather than a full open. When enabled, the order will only reduce an existing position, never open a new one. This is useful for scaling in/out of a position in stages.
Reduce Only is mutually exclusive with the other exit settings. Turning it on disables TP/SL and the Trigger, because a reduce-only order is itself the exit rather than something that needs one.
Example
Setup: Open a long BTC-USDC position at market when EMA(12) crosses above EMA(24).
Order configuration:
- Asset: BTC-USDC
- Direction: Long
- Order type: Market
- Slippage: 1%
- Leverage: 10x
- Size: 0.01 BTC
Exit conditions:
- Take Profit: 5% above entry
- Stop Loss: 2% below entry
- Trigger: RSI(14) crosses above 70
When the entry condition is met, the Order node opens the position. All three exit conditions run simultaneously from that point. The first one to trigger closes the position.