Using Multiple Assets
A single strategy can trade more than one market. Each Order node targets a specific market, so building a multi-market strategy is a matter of adding multiple Order nodes and configuring each one independently.
How it works
Each Order node has its own market selector. You pick the market (BTC, ETH, SOL, and so on) per node. One strategy can open a BTC long and an ETH short in the same flow.
The conditions that trigger each Order node can be shared (one Indicator feeds multiple nodes) or separate (each market has its own Indicator with different conditions).
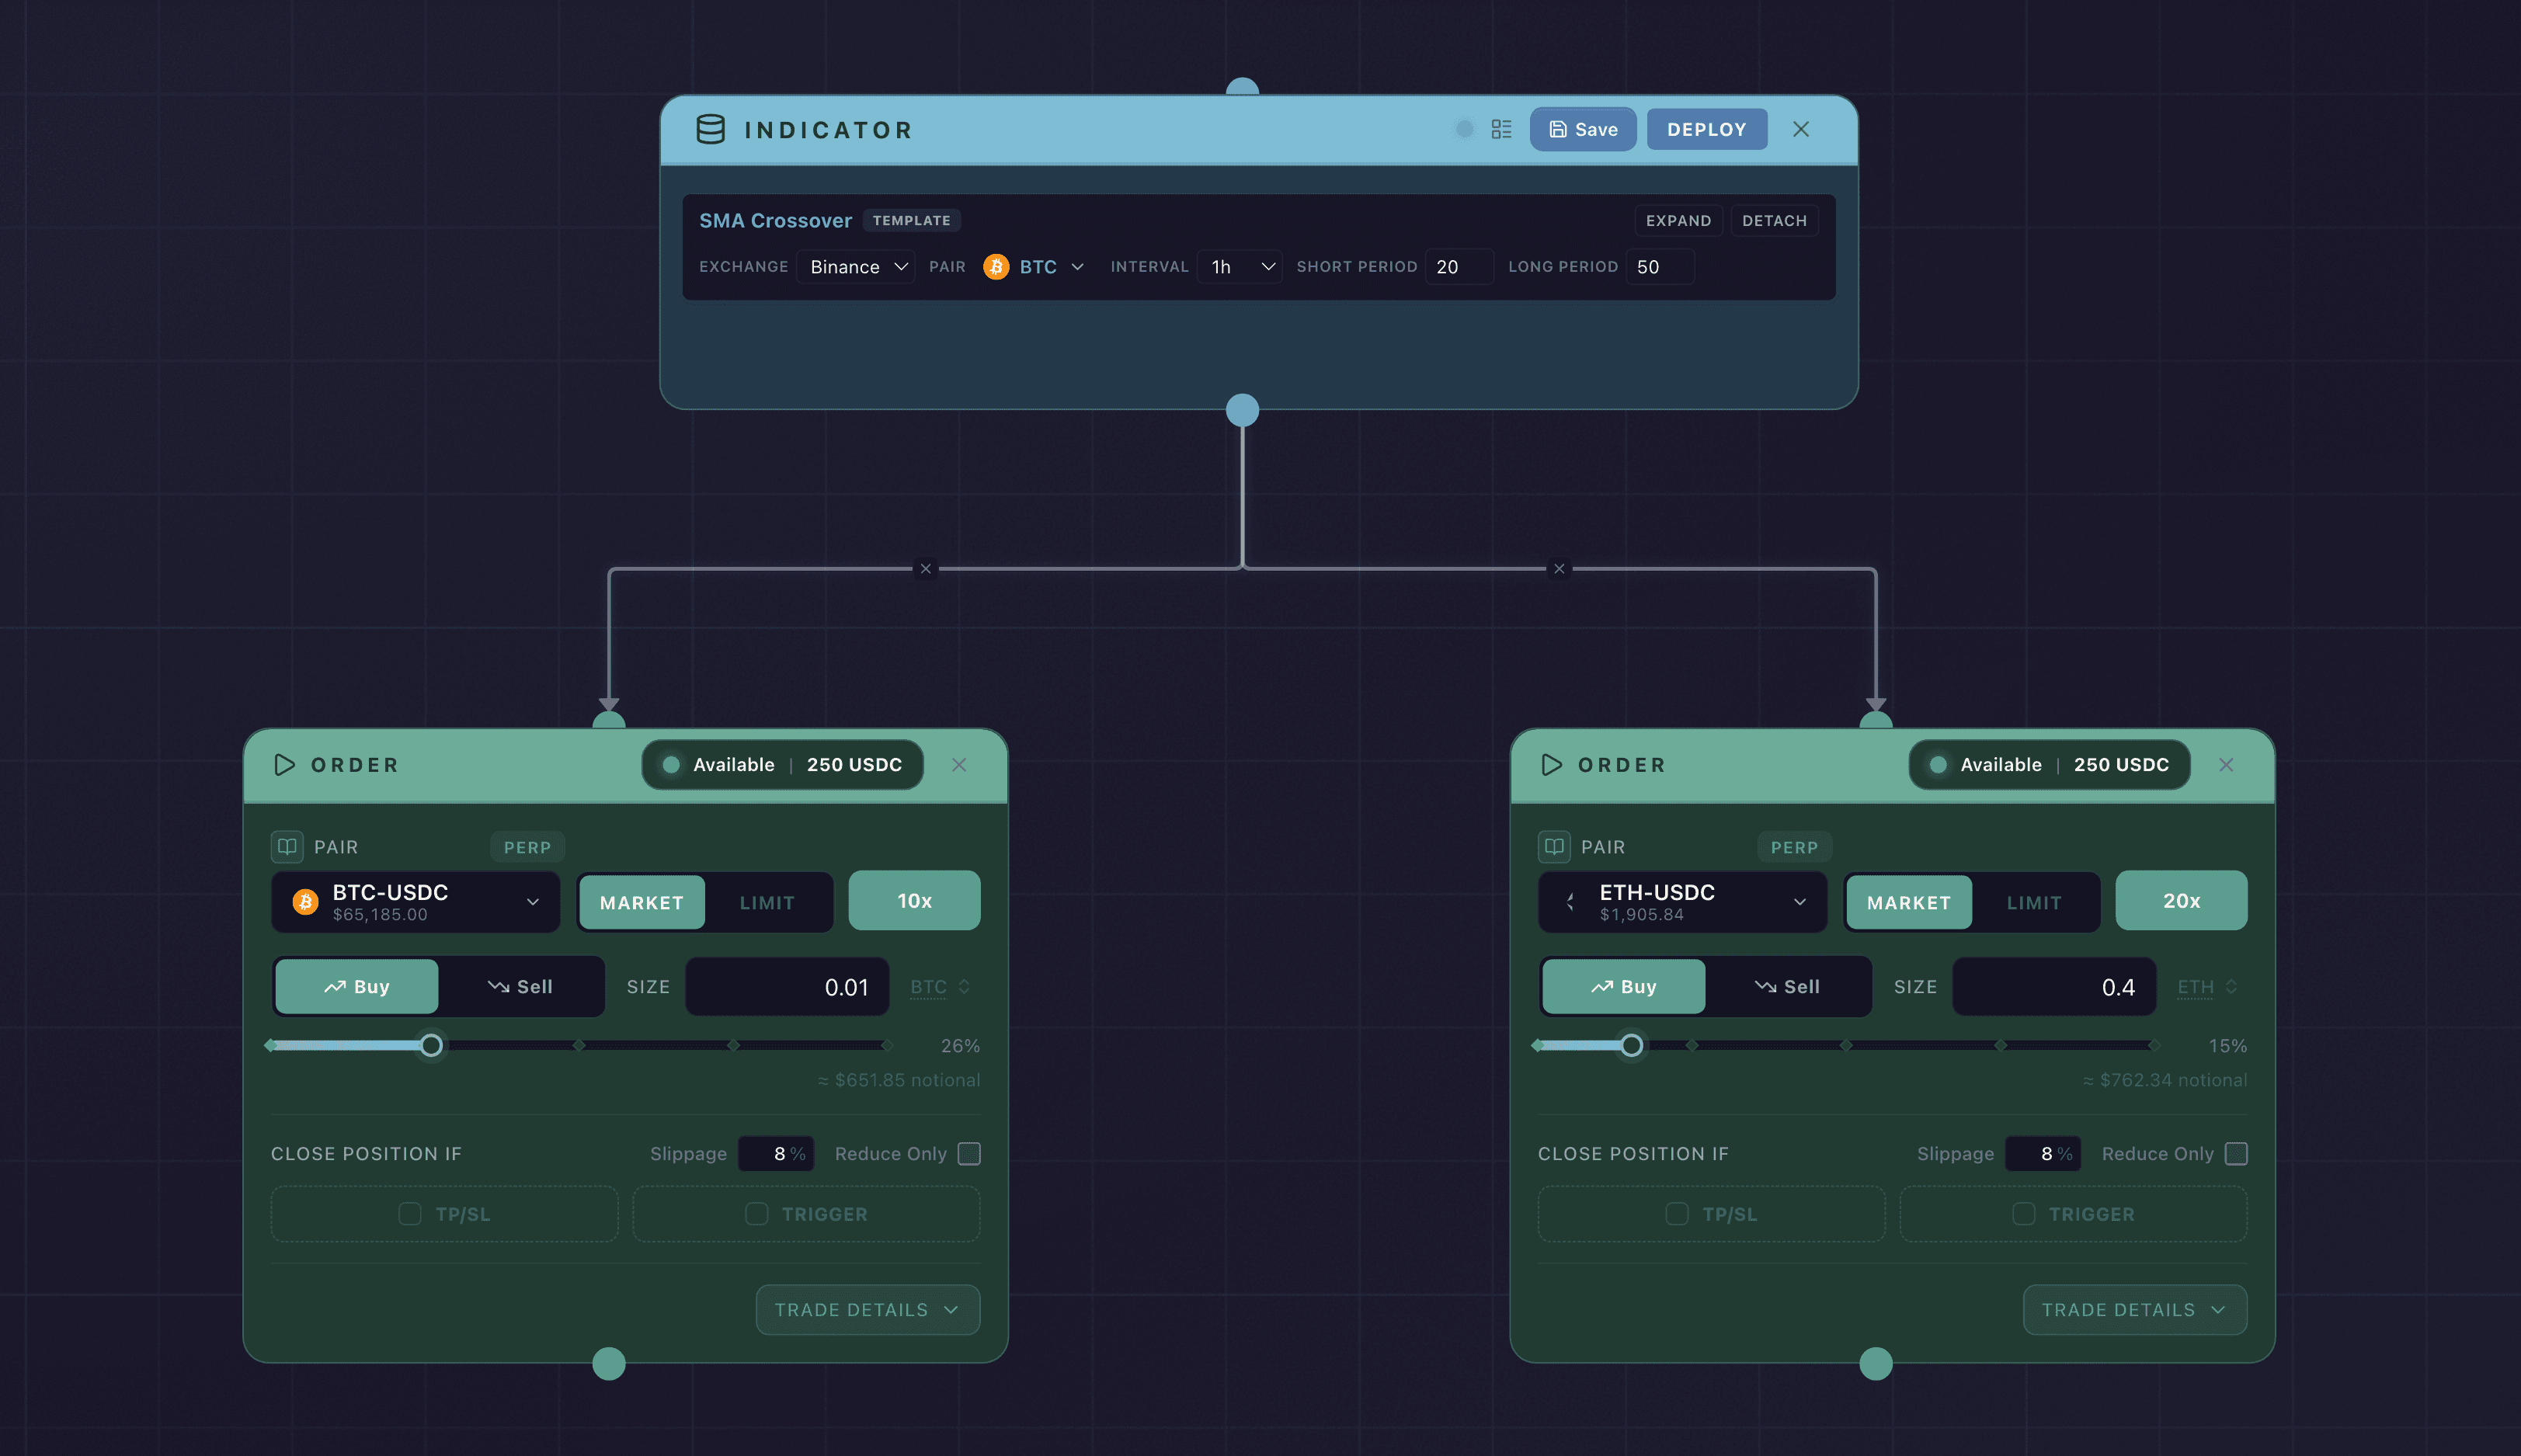
Pattern 1: One trigger, multiple markets
A single Indicator node passes control to multiple Order nodes in parallel.
One Indicator can fan out to several Order nodes, and they all run together when the condition is met. This is how a single trigger opens positions in multiple markets at once.
Example: When EMA(12) crosses above EMA(24), buy BTC and ETH simultaneously.
To build this:
- Add one Indicator node with your entry condition.
- Add two Order nodes: one for BTC, one for ETH.
- Connect the Indicator’s output to both Order node inputs.
Both Order nodes run when the condition is true.
Pattern 2: Separate triggers per market
Each market has its own Indicator node with conditions specific to that market.
Two independent flows, each with its own Indicator and Order, trading its own market.
Example: Buy BTC when RSI < 30, and buy ETH only when volume is above a threshold.
To build this:
- Add an Indicator node for BTC with RSI conditions. Connect it to a BTC Order node.
- Add a second Indicator node for ETH with volume conditions. Connect it to an ETH Order node.
The two flows are independent. Each runs only when its own conditions are met.
Margin across markets
Each Order node sets its own leverage and size, so you control the exposure per market right inside the node. Margin type, isolated versus cross, is not a per-node setting. It is read from your account and market configuration on the exchange rather than chosen on the canvas. Set leverage and size deliberately on each Order node, and read Leverage, Margin, and Liquidation for how those choices translate into margin on a live position.
Your balance is shared across strategies
A deployed strategy does not lock up capital. Your balance is only drawn on when a strategy actually trades, so several strategies, or several Order nodes, can stand ready on the same funds at once. With 1,000 USDC you could deploy ten different strategies that each watch for their own signal against that same 1,000. Whichever condition becomes true first trades first.
This lets you set up many contingent ideas on one balance, for example several limit-order-like setups that each wait for a different price or signal, without splitting your capital across them in advance. Your own trading draws on that same balance, so placing a manual order on the same account leaves less standing behind every strategy you have deployed.
When more than one strategy trades the same market, Synchronicity still tracks the exposure each one owns separately. See Strategy Positions for how that attribution works.
Two things to keep in mind. A later signal can arrive to find the balance already committed by an earlier trade, so size and sequence your strategies with that in mind. And because a strategy sends its order when its condition becomes true, rather than resting on the order book, expect a small delay between the signal and the fill. For an exact resting price with no delay, a native Hyperliquid limit order is the better tool. A strategy is the better tool for conditional, multi-signal, or shared-capital setups.
Exit conditions per market
Each Order node that needs an exit should have its own closing Trigger configured. Each one operates independently and watches only the position opened by its own Order node. For details on configuring exits, see Configure a Take Profit, Configure a Stop Loss, and Set Order Conditions.
Tips
- The canvas can get complex with multi-market strategies. Use the Notes node to label sections of your flow for readability.
- Trace each path from trigger to exit visually before deploying. It’s easy to miss a disconnected node in a busy canvas.
Every market you add stacks its own exposure on the same account. Two Order nodes running together open two live positions, and the margin behind them adds up. Confirm your total position size across all markets fits your balance before you deploy.